
How to Invite a Vendor Contact to the Vendor Portal
The Vendor Portal is where your vendors see their jobs, send invoices, track payment, and add bank details. A vendor gets in through a contact on its record: a contact with an email address can sign...
Last updated
The Vendor Portal is where your vendors see their jobs, send invoices, track payment, and add bank details. A vendor gets in through a contact on its record: a contact with an email address can sign in with a one-time code. Adding a contact never sends anything by itself. To tell a contact how to get in, you send them a portal invite.
Before you start
- The contact needs an email address. The Add Vendor wizard now requires one when you add a contact ("Email is required"). A contact saved earlier without an email cannot sign in and cannot be invited. Edit the contact to add one first.
- Open the vendor from one of your properties. The invite is sent on behalf of that property and names it in the email. If you open a vendor without a property selected, the button is disabled and the line under it reads "Open this vendor from one of your properties to send an invite."
- You need to be a member of that property with permission to view its service tickets.
Send the invite
- Go to Operations, then Vendors, and open the vendor.
- Open the Contacts tab.
- On the contact's card, select Send portal invite.
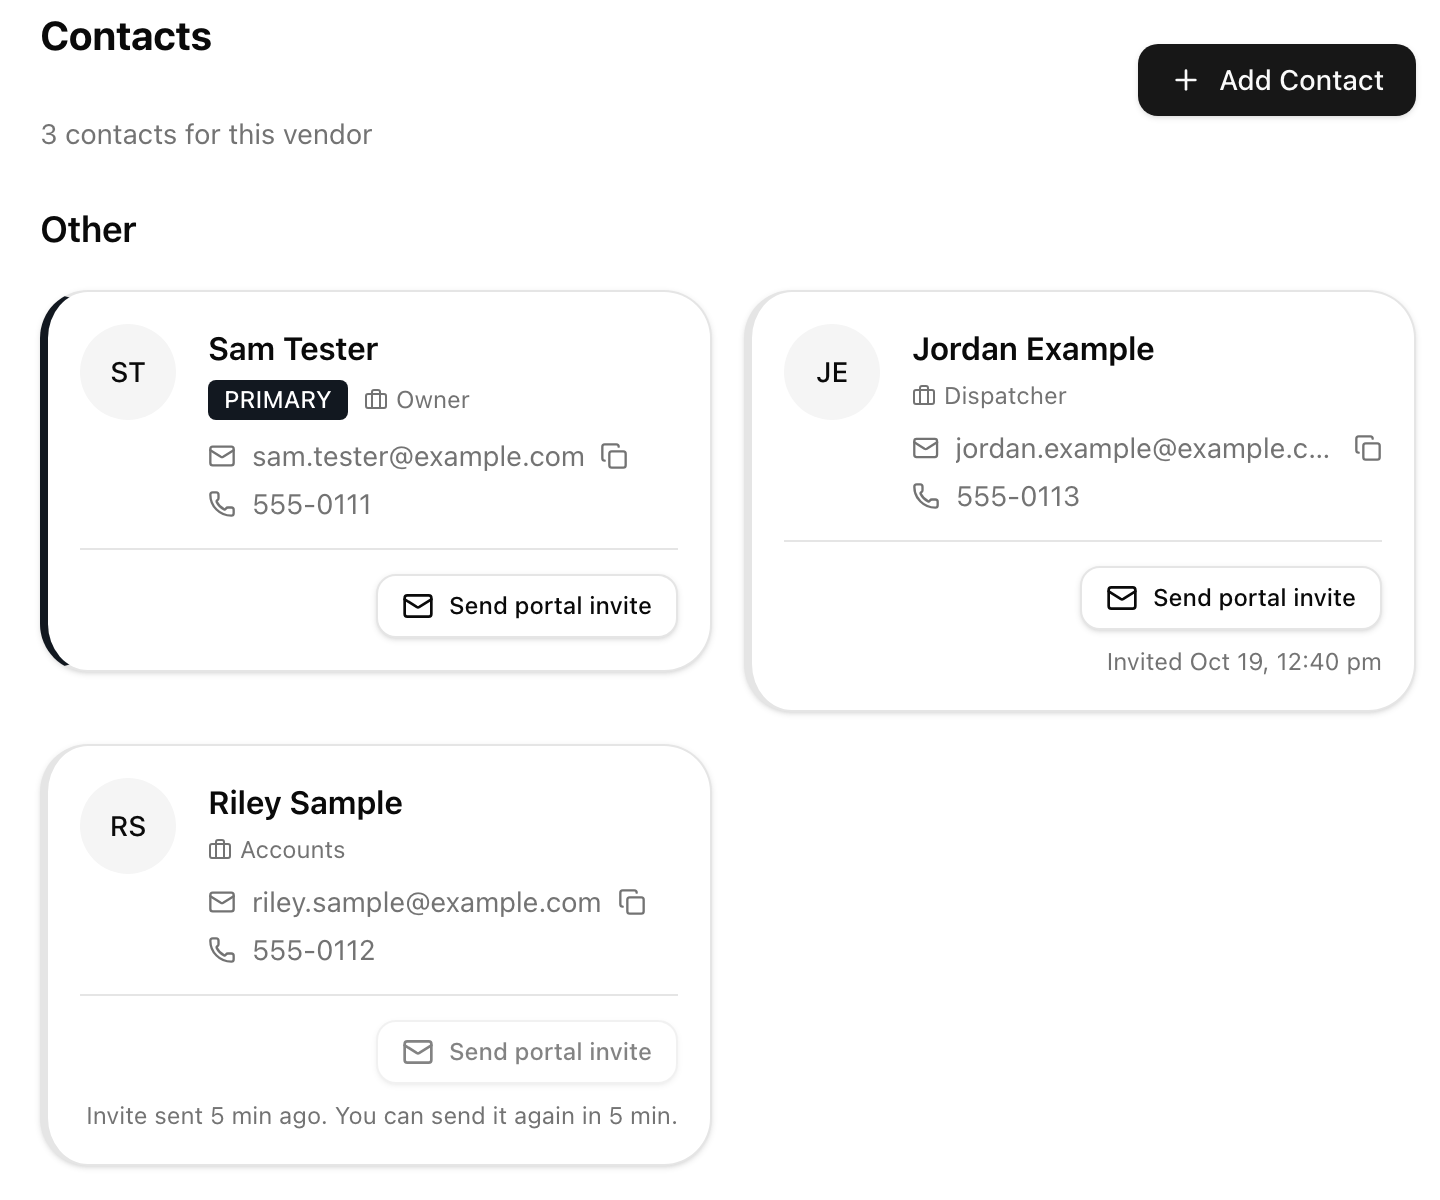
The line under the button tells you where things stand:
- Nothing sent yet: the button is ready, with no line under it.
- Just sent: "Invite sent just now. You can send it again in 10 min." Later it counts down, for example "Invite sent 4 min ago. You can send it again in 6 min."
- After the 10 minutes: "Invited Oct 14, 3:10 pm". You can send it again.
- No email on the contact: the button is disabled and the line reads "Add an email to send an invite."
There is a 10 minute wait between invites to the same contact, so a contact is never flooded. There is no success message: the line under the button is your confirmation, and you only see a message if the send fails.
What the contact receives
An email titled "
What if the contact still cannot sign in
- The address must be the exact address on the contact. The vendor's general company email cannot sign in, only contacts' emails.
- Archived vendors cannot sign in and cannot be sent an invite. Archiving a vendor, or archiving a service ticket, also closes that vendor's work order and request for proposal links for the job: the vendor sees "Work order not found" or "Link not found", and nothing they send through the link is saved.
- A vendor can request only 3 sign-in codes per hour per address, and each code lasts 10 minutes. If they have tried several times, ask them to wait and try again.
Payout invitations go to contacts too
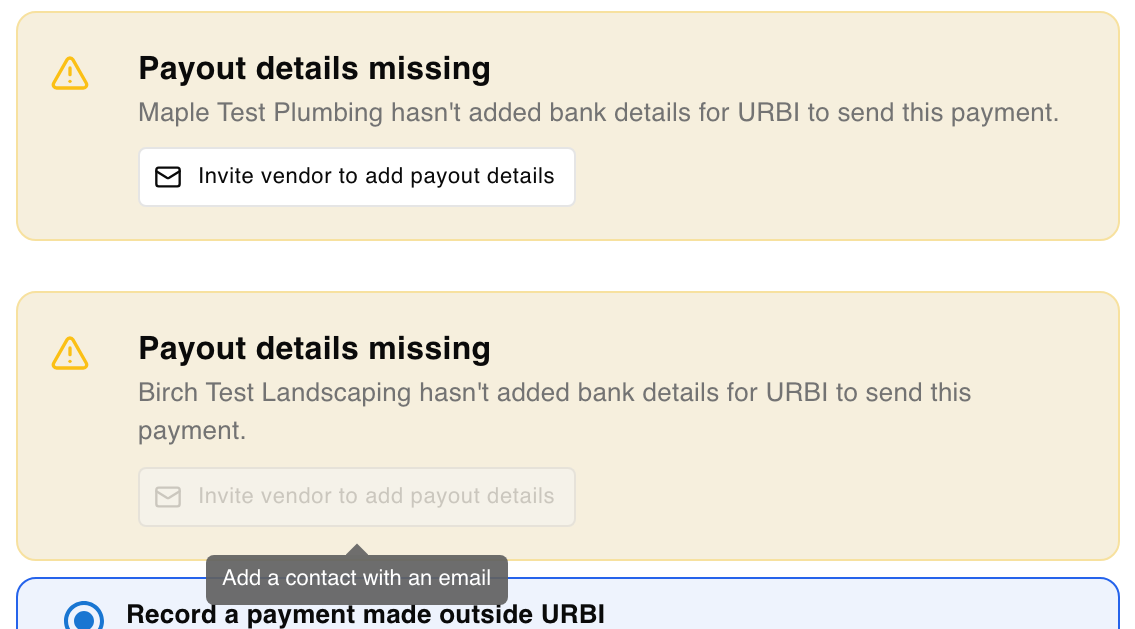
When you pay a vendor bill and the vendor has no payout details, the Pay this bill window offers Invite vendor to add payout details. That email goes to one of the vendor's contacts that has an email address, never to the company's general email address. URBI prefers an accounts receivable contact, then an account contact, then any other contact with an email.
If the vendor has no contact with an email, the button is disabled and its hint reads "Add a contact with an email". Add a contact first, or add the email to an existing one, and the button turns on. The same rule applies to the other notices that tell a vendor about their payout, such as a reminder to add bank details: they go to contacts only, and a vendor with no contact email does not receive them.